Crafting Beyond Limits: Creative Printable Ideas and Advanced Craft Workflows for Digital Art
Transform flat digital art into tactile, three-dimensional keepsakes with these advanced creative printable ideas and mindful DIY craft workflows.
Heather Middleton
October 16, 2026
Crafting Beyond Limits: Creative Printable Ideas and Advanced Craft Workflows for Digital Art
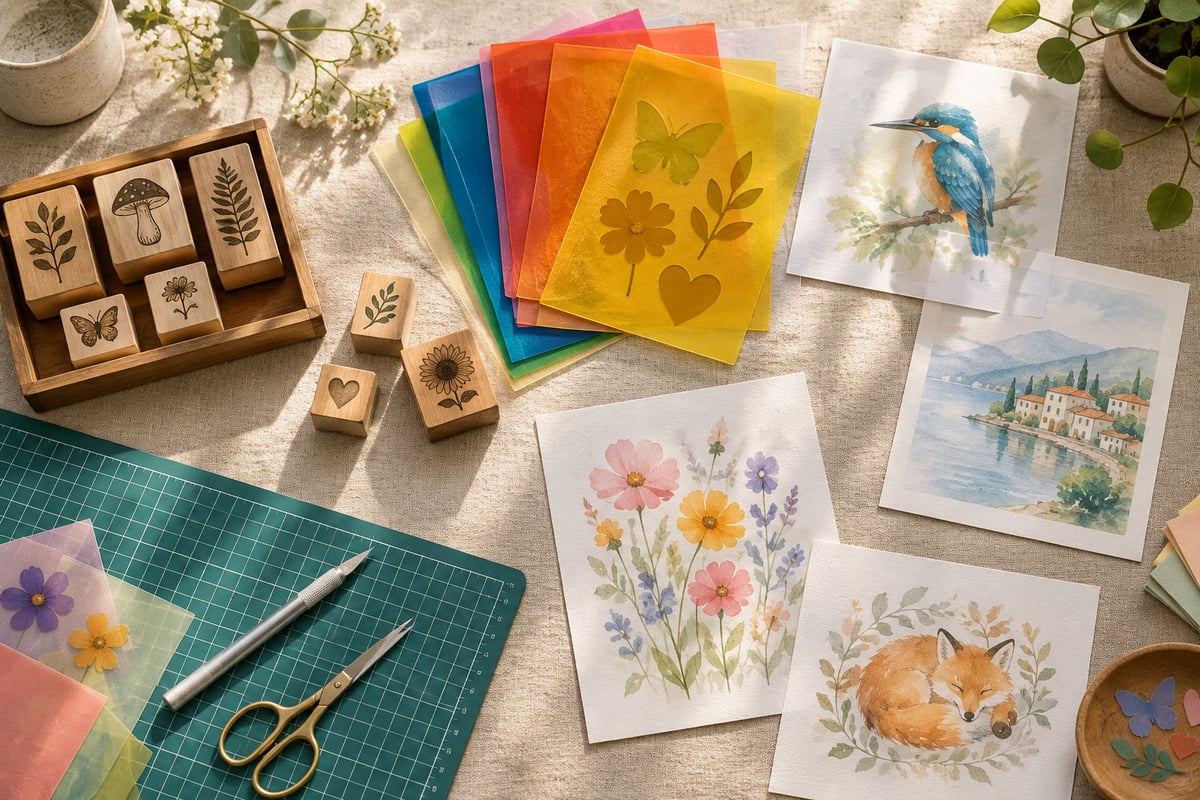
In a world of mass-produced decor, your home should be a sanctuary of personal expression, not a carbon copy of a social media feed. While printable wall art offers a flexible, budget-friendly way to style a space with cottagecore, witchy, or botanical themes, the potential of digital art extends far beyond the traditional frame. By exploring creative printable ideas, you can transform flat digital files into tactile, three-dimensional keepsakes that tell your unique story.
As the creator behind SelfLoveJourney33 on Etsy, I spend my days designing digital assets, formatting multi-ratio files, and visualizing how art transitions from a glowing screen into physical reality. This guide explores advanced, creative printable ideas that turn digital files into tangible, tactile keepsakes, blending art therapy benefits with rigorous chemical and technical techniques for flawless DIY execution.
Beyond Wall Art Printables: Transforming Digital Designs into Mindful Crafts
In our increasingly screen-centric lives, the physical act of creating with your hands offers a vital mental health sanctuary. Engaging in hands-on crafting transitions our relationship with art from passive viewing to active, physical engagement. This transition is highly therapeutic; according to the World Health Organization, active participation in the arts offers comprehensive health benefits, particularly in helping individuals manage stress and regulate emotions. Furthermore, peer-reviewed NIH research highlights how creative, tactile activities reduce cortisol levels, ease anxiety, and promote mindful focus.
[Digital File] ──(Mindful Crafting)──> [Tactile Object] ──> [Cortisol Reduction & Grounding]
When you look beyond wall art printables, you open up a playground of physical mediums—such as wood, resin, ceramic, and shrink plastic—that require focused, slow-paced interaction. This physical grounding is especially powerful when working with niche artwork that speaks directly to your personal journey:
- Cottagecore & Botanical prints: Bring a sense of organic serenity and slow living into high-stress spaces like home offices.
- Witchy & Esoteric themes: Act as symbols of personal empowerment, mindfulness, and spiritual exploration.
- Humorous or Christian art: Provide moments of lighthearted joy or quiet, daily contemplation.
The Beauty of Imperfect Crafting
A home should reflect personal taste, meaningful art, and thoughtful gifts rather than passing, algorithm-driven trends. While printable digital art provides unparalleled flexibility, it is important to embrace an honest truth: the final physical piece will never look exactly like the digital screen mockup.
Variations in paper fibers, printer calibrations, humidity, and chemical sealants will naturally cause shifts in color and texture. Rather than viewing these as defects, celebrate them as the fingerprint of handcrafting. An imperfect, hand-transferred piece of art carries far more character than a sterile, factory-printed poster.
Waterslide Decal Crafts: Bringing Digital Art to Glass and Ceramics
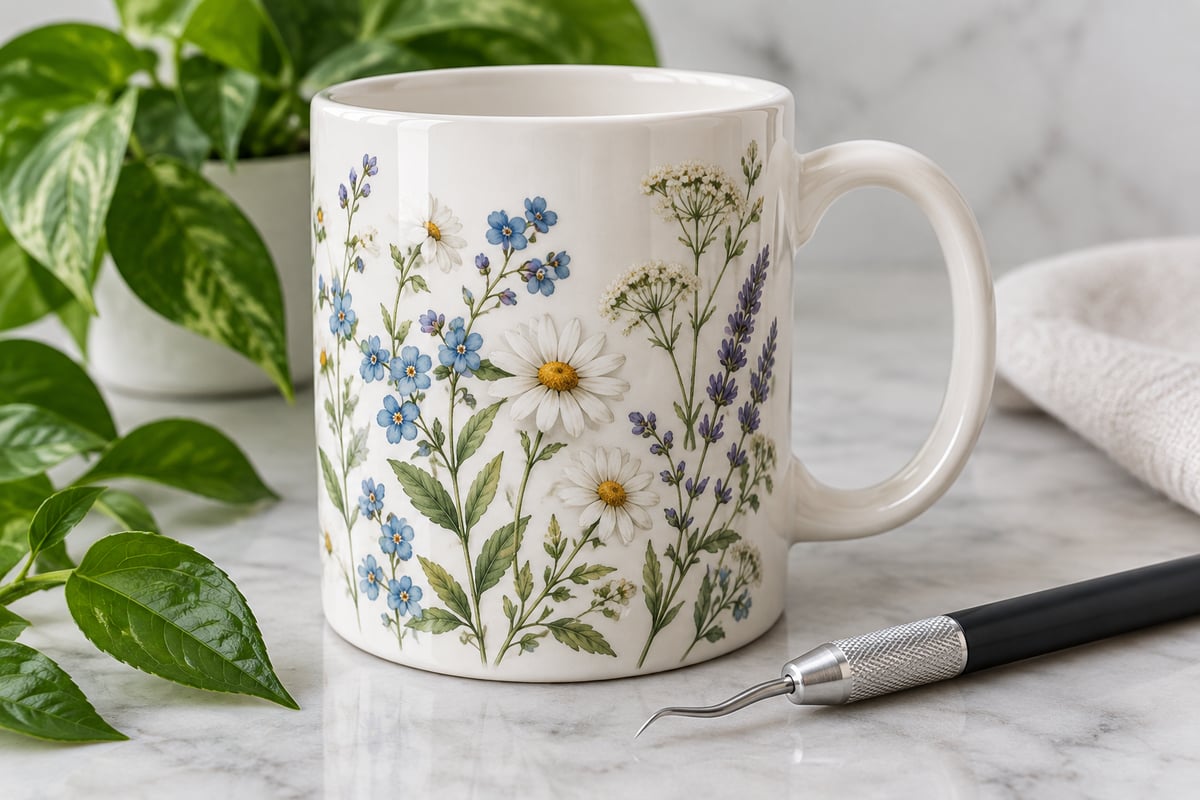
If you have ever wanted to transfer intricate, colorful designs onto non-porous surfaces like mugs, candle jars, glassware, or glazed ceramics, waterslide decal crafts are the gold standard. Unlike thick vinyl stickers that peel at the edges, waterslide decals lay incredibly flat, creating a seamless, hand-painted appearance.
The Chemistry of Ink and Sealants
To execute this advanced craft successfully, you must understand the interaction between your printer's ink and the water used during the transfer process:
- Dye-Based Inks vs. Pigment Inks: Most standard inkjet printers use dye-based inks, which are water-soluble. If unprotected dye-based ink touches water, it will instantly bleed and ruin your artwork. Pigment-based inks offer better water resistance and UV durability, but they still require sealing to prevent scratching.
- The Acrylic Shield: To protect your print, you must apply a high-quality, clear acrylic spray sealer (such as Krylon Crystal Clear or Rust-Oleum 2X Painter's Touch Clear) over the printed sheet before water exposure. This spray forms an impermeable plastic barrier over the ink.
| Parameter | Dye-Based Ink | Pigment-Based Ink |
|---|---|---|
| Water Solubility | High (bleeds instantly without sealant) | Moderate (highly resistant but still needs sealant) |
| Color Vibrancy | Exceptionally bright, wide color gamut | Soft, natural tones; highly matte |
| Best Substrate | Glossy waterslide paper | Matte or clear waterslide paper |
Step-by-Step Waterslide Transfer Protocol
[Print Design] ──> [Apply 3 Thin Sealer Coats] ──> [Soak in Warm Water] ──> [Slide onto Surface] ──> [Squeegee Bubbles]
- Print your design: Using your inkjet printer, print your selected artwork from our shop onto a sheet of premium waterslide decal paper. Ensure your printer settings are set to "High Quality" and "Photo Paper."
- Dry completely: Let the ink air-dry for at least 30 minutes. Do not touch the printed surface.
- Seal the ink: In a well-ventilated outdoor space, apply three very thin, even coats of clear acrylic sealer. Allow 15 minutes of drying time between each coat. Crucial tip: Heavy coats will run and dissolve the ink; thin coats are key.
- Cut the design: Once dry, use sharp scissors to cut out your design, leaving a tiny 1mm boundary around the artwork.
- Soak and slide: Submerge the decal in a shallow dish of warm water for 30 to 45 seconds. You will feel the decal backing begin to slip. Wet your ceramic or glass surface slightly to allow for easy positioning. Slide the thin film off the paper backing directly onto your object.
- Squeegee and cure: Use a damp sponge, rubber squeegee, or micro-fiber cloth to gently push out any trapped water bubbles from the center outward. Let the item dry for 24 hours.
Safety Note: When working with chemical aerosol sealants, always follow CDC guidelines for lung protection by spraying outdoors or in a highly ventilated workspace. Remember that waterslide decals sealed with acrylic are not food-safe; apply them only to the exterior of mugs, jars, and decorative plates, and hand-wash only.
Image Transfer to Wood DIY: Achieving a Rustic, Cottagecore Aesthetic
For lovers of warm, rustic interior styling, an image transfer to wood DIY project bridges the gap between digital precision and organic warmth. By chemically transferring ink directly into the grain of raw wood, you create a piece of art that looks aged, weathered, and deeply integrated with the natural substrate.
Surface and File Preparation
For this workflow, we rely on mechanical and chemical adhesion using a professional acrylic gel medium (such as Liquitex Matte Medium or Golden Gel Medium).
- Wood Selection: Choose light-colored, fine-grained woods like basswood, birch plywood, or unfinished pine. Avoid heavily treated woods or species with highly oily grains. Sand the surface smooth with 220-grit sandpaper and wipe away all dust.
- The Mirroring Rule: This is the most common pitfall in wood transferring. Because you are pressing the print face-down onto the wood, the image will transfer in reverse. You must horizontally flip (mirror) your design before printing. This is vital for text-based cottagecore designs or asymmetrical botanical illustrations.
[Standard Digital File] ──(Horizontal Flip/Mirror)──> [Print on Laser Paper] ──> [Transfer to Wood] ──> [Correct Orientation]
Technical Execution Steps
- Print on the right paper: Use a laser printer or a high-quality dry-toner copier. Standard inkjet ink will not work for gel medium transfers, as it absorbs too deeply into the paper fibers rather than sitting on top of the gel. Use standard, lightweight copy paper rather than thick photo paper.
- Apply Gel Medium: Brush a generous, even layer of matte gel medium onto the wood surface. The layer should be wet and opaque, but not pooling.
- Apply and Burnish: Lay your mirrored print face-down onto the wet gel. Starting from the center, use a scraper, brayer, or plastic card to firmly burnish the back of the paper. Press out all air bubbles and ensure 100% contact.
- Dry Completely: Allow the gel medium to cure for a minimum of 12 to 24 hours. Do not rush this step with a hair dryer, as uneven heating can warp the wood and ruin the adhesion.
- Fiber Removal: Spritz the back of the dry paper with water until it becomes saturated and translucent. Using the pads of your fingers, gently rub in circular motions to peel away the wet paper pulp. The wood-bound acrylic gel will hold the embedded ink, while the paper fibers slide off.
- Seal and Finish: Once all paper pulp is removed and the wood is dry, seal your new botanical and cottagecore printables with a thin coat of natural beeswax or clear matte varnish to protect the ink and enrich the wood grain.
How to Print on Shrink Plastic for Custom Jewelry and Charms
Shrink plastic (often known by the brand name Shrinky Dinks) is an incredibly satisfying, high-tech polymer material that shrinks to roughly one-third of its original size and increases to nine times its original thickness when exposed to heat. Learning how to print on shrink plastic allows you to make miniature art charms, custom earrings, spiritual keychains, and highly detailed zipper pulls from digital designs.
Color and Resolution Physics
Shrinking plastic alters the physics of light reflection and color density. When the polymer chains contract under heat, the ink particles on the surface are compressed tightly together.
- The Color Compression Effect: Colors will look significantly darker, richer, and more saturated after baking. To compensate, open your digital art in an editing program and lower the opacity/saturation by 30% to 40%. What looks pale and washed out on your screen will bake into a perfectly vibrant, rich shade.
- Resolution and Sizing: Always start with high-resolution, 300 DPI artwork. To calculate your pre-baked size, multiply your desired finished size by 2.5 or 3 (depending on your specific brand's shrinkage rate). For advanced projects, use SVG crafting ideas advanced layouts to draw exact cut lines and hole punches directly onto your printable plastic sheets.
Desired Finished Size: 1 inch ──(Multiply by 2.5 to 3x)──> Print Sizing: 2.5 to 3 inches
Baking and Refinement Guide
- Select Inkjet-Compatible Shrink Plastic: Standard shrink plastic is too slick for inkjet printers; you must purchase sheets specially coated with a matte, receptive surface.
- Print and Cut: Print your adjusted, lightened designs. Cut out your shapes using sharp scissors or a craft knife. If you are making charms or keychains, use a standard 1/4-inch hole punch before baking. The hole will shrink down to a perfect size for jump rings.
- The Bake: Pre-heat your oven or toaster oven to 325°F (163°C). Place your cutouts on a baking sheet lined with parchment paper.
- The Shrinking Dance: Watch through the oven window. The plastic will curl, twist, and look completely ruined. Do not panic. Within 2 to 3 minutes, the plastic will flatten back out, signaling that the structural shrinking process is complete. Leave it in the oven for an additional 30 seconds to fully cure.
- Flatten and Seal: Remove the pieces and immediately press them flat with a heavy, flat-bottomed glass or acrylic block while they are still hot. Once cooled, protect the printed side with a thin coat of UV resin or water-based acrylic sealer.
Epoxy Resin Digital Print Inserts: Creating Durable, High-Gloss Keepsakes
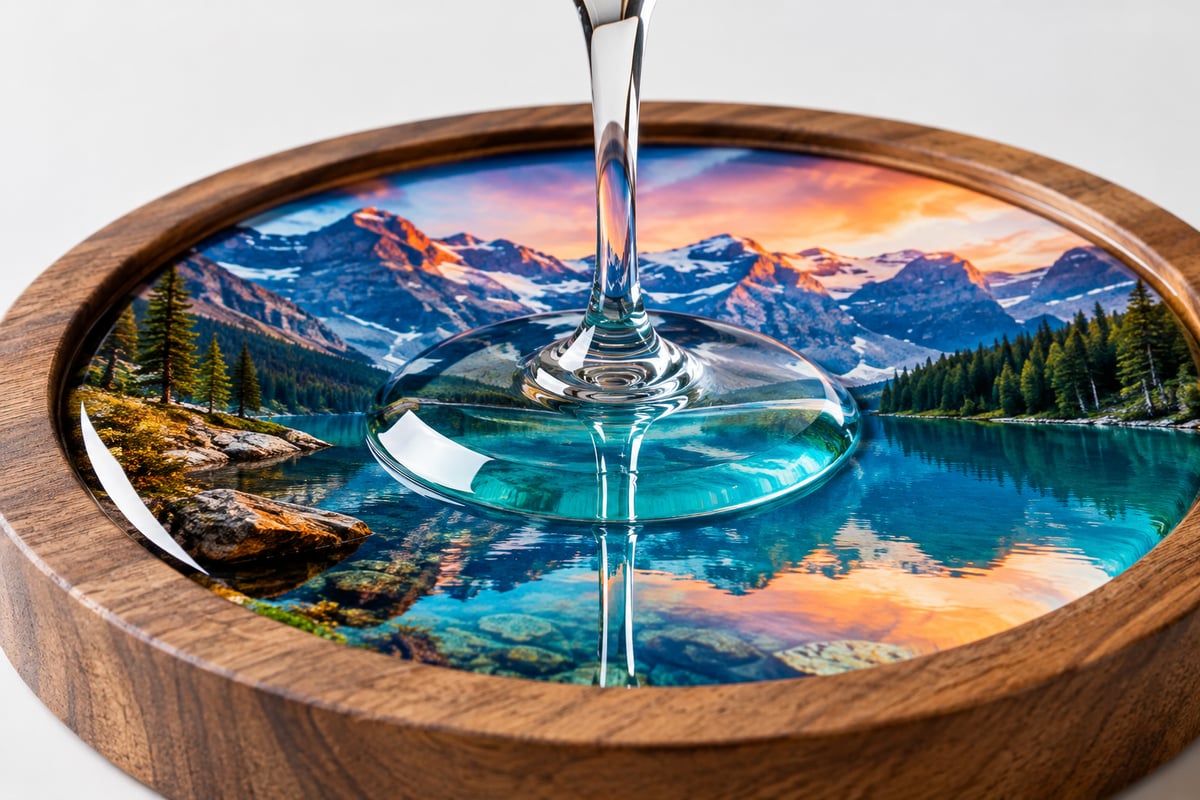
If you want to create ultra-glossy, glass-like paperweights, custom trays, or jewelry pendants, casting epoxy resin digital print inserts is an exceptional technique. However, pouring liquid resin directly onto raw paper is a recipe for disaster. The organic fibers of the paper will absorb the liquid polymer, resulting in a dark, translucent, "wet paper" appearance that obscures your artwork.
[Raw Paper Print] + [Epoxy Resin] ──> Dark, Translucent, Ruined Ink
[Sealed Paper Print] + [Epoxy Resin] ──> Pristine, Vibrant, High-Gloss Finish
The Sealing Protocol: Protecting Paper Fibers
To preserve the vibrant details of your pet portraits, botanical layouts, or spiritual art, you must build an impermeable barrier around the paper before embedding it.
- Paper Weight Selection: Opt for heavyweight matte photo paper or thick, smooth cardstock. Thin copy paper is fragile and prone to warping when wet.
- The Double-Seal Method: Use Mod Podge, white PVA glue, or clear micro-glaze. Brush a thin, even coat across the front, back, and—most importantly—the raw cut edges of your paper insert. Let it dry completely, and repeat this process 2 to 3 times. If even a microscopic pinhole is left unsealed, the resin will seep in and create greasy spots.
Resinating Safely and Flawlessly
Step 1: Double-Seal Paper ──> Step 2: Pour Thin Resin Base ──> Step 3: Embed Insert ──> Step 4: Top Pour & Degas
When working with liquid epoxy resin, safety is paramount. Always wear nitrile gloves, protective eyewear, and work in a room with strong cross-ventilation, in accordance with safety recommendations for handling volatile organic compounds (VOCs).
- Layering the Cast: Pour a thin base layer of mixed epoxy resin into your mold. Use a heat gun or isopropyl alcohol spray to pop any surface bubbles.
- Embedding the Art: Gently slide your sealed paper insert into the resin at an angle to avoid trapping air bubbles underneath. Press it down lightly using a clean silicone tool.
- The Top Pour: Pour a second layer of resin over the insert to fully encase it. Check the piece every 15 minutes for the first hour, using a lighter or heat gun to pop any rising micro-bubbles. Let it cure for a full 24 to 72 hours in a dust-free environment.
Choosing the Right File Formats: SVG Vector Workflows vs. Print-Then-Cut
For crafters utilizing modern electronic cutting machines (such as Cricut, Silhouette, or Brother ScanNCut), organizing your digital files correctly makes the difference between a frustrating afternoon and a flawless workflow.
SVG Vectors vs. High-Resolution Raster Graphics
Different projects demand different digital file architectures. Understanding when to use an SVG vector versus a high-resolution PNG or PDF is key to streamlining your design process.
               ┌───────────────────────┐
               │  Which File to Use?   │
               └───────────┬───────────┘
                           │
             Is it multi-colored/highly detailed?
            ┌──────────────┴──────────────┐
           YES                            NO
            │                             │
    [Print-Then-Cut]              [SVG Cut File]
   (PNG/PDF @ 300 DPI)          (Crisp vector paths)
- SVG (Scalable Vector Graphics): SVGs do not contain pixels; instead, they consist of mathematical paths, anchor points, and curves. No matter how large you scale an SVG, it will remain infinitely sharp. This makes SVGs the absolute standard for SVG crafting ideas advanced projects, such as vinyl cutting, paper piecing, wood engraving, and creating custom stencils.
- PNG and PDF (Raster Graphics): These formats contain fixed grids of pixels. They are essential for highly detailed, multicolored artwork like watercolor paintings, pet portraits, and complex botanical layouts. For these, you will use your cutting machine's "Print-Then-Cut" feature, printing the design onto paper first and using the machine's optical sensor to cut around the printed edges.
Anatomy of an SVG for Cutting Machines
When importing SVGs into software like Cricut Design Space or Silhouette Studio, pay close attention to layer management:
- Compound Paths: Ensure your design elements are welded together properly so the machine reads them as single, cohesive cuts rather than scattered, individual shapes.
- Score Lines vs. Cut Lines: If your project involves dimensional papercrafting or folding, change the designated cut paths to "Score" lines within your software settings before sending the file to the machine.
- Digital Scrapbooking for Journals: For multi-layered projects, use SVG templates to cut out precise frames, pockets, and decorative borders, then layer them with high-resolution PNG prints to create rich, textured layouts.
Elevating Your Crafting Space and Mindset
Transitioning digital art into physical objects is more than a creative hobby; it is a profound practice of mindfulness, self-expression, and home curation. By experimenting with advanced substrates like wood, resin, shrink plastic, and waterslide paper, you can bring digital designs into the physical world as deeply personal, therapeutic creations.
Remember that crafting is a journey of self-care and individual expression. Focus on what resonates with your space and spirit over passing market trends, and embrace the beautiful variations that handcrafting brings.
If you are ready to transform your craft room into a mindful, creative retreat, visit our curated collection of custom digital designs to find the perfect assets for your next advanced crafting adventure. Let's make something beautiful today!